How to mark an expense as Verified or Not-Verified?
- Log On to your Legalxgen Account
- Go to Accounts -> Expenses

- Identify the expense you want to mark as Verified or Not-Verified.
- Go to the Action Column for the expense (present in the extreme right hand side)
- You’ll see an Option ‘Mark as Verified‘ or ‘Mark as Not-Verified‘
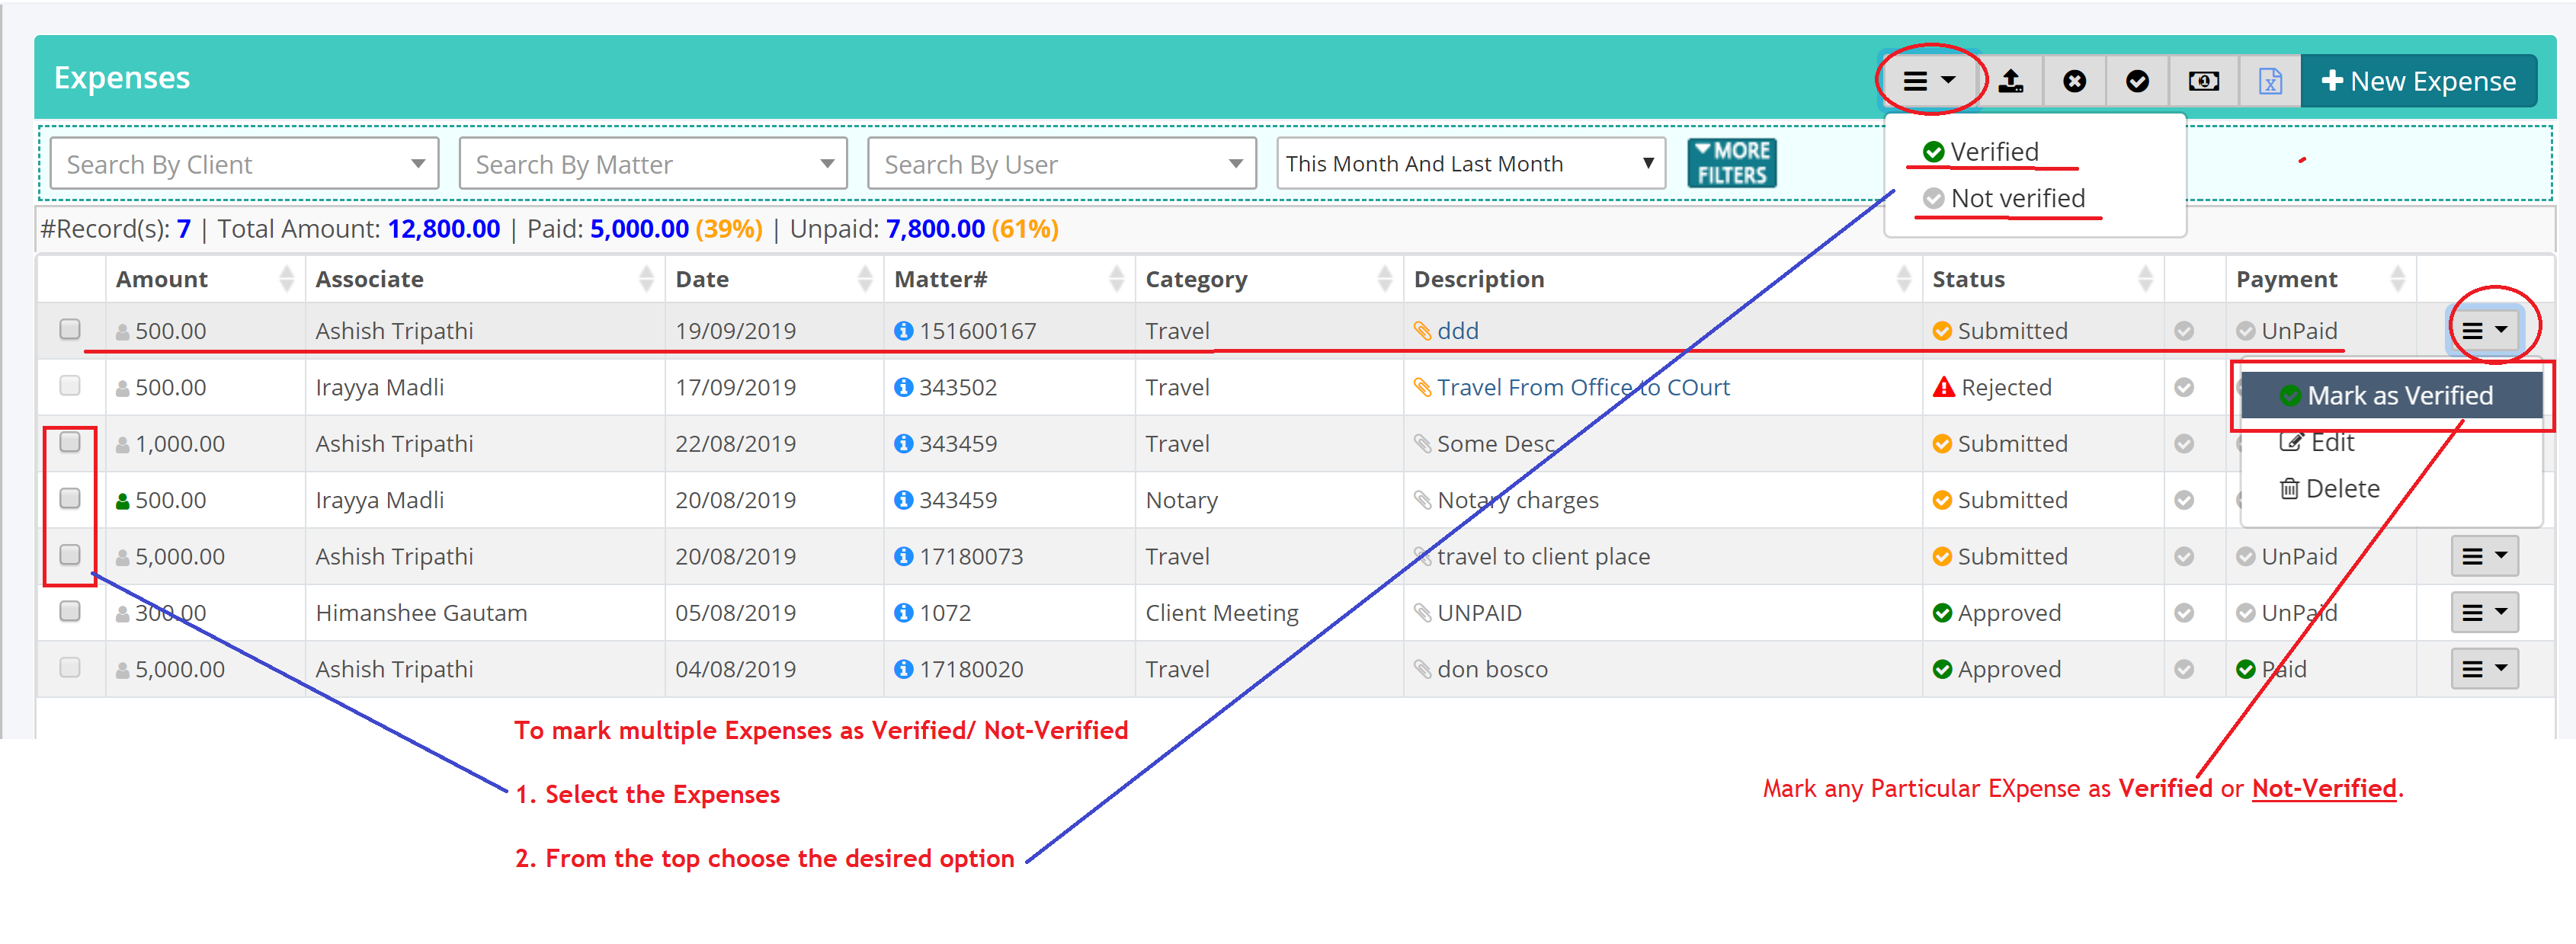
- Select the appropriate option.
- Similarly to mark Multiple Expenses as Verified/ Not-Verified, you may select the Expense(s) and then from the top select the appropriate option.