How to create time entry into LegalXGen?
- Watch simple video to understand time entry process (2:06 minutes).
- Or, follow the instructions below:
- Logon to your LegalXGen Account
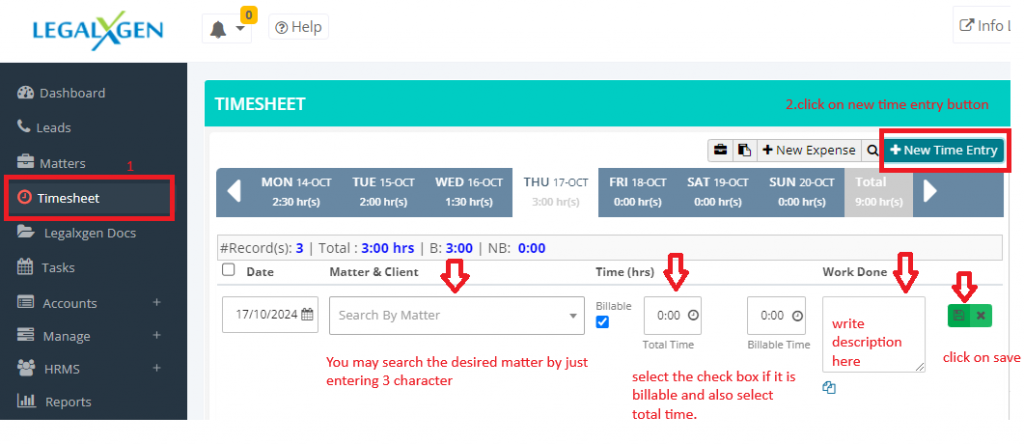
- Click on the menu option ‘Timesheet‘ on your left. (most of the users are by default redirected to Timesheet view only)

- Once you’re redirected to ‘Timesheet’ you’ll see a calendar representation for the current week. By default current date is selected.
- Following fields are mandatory for making a time entry:
- Date: Date for which you wish to make the time entry.
- Matter: Select the matter. It can be searched by typing few characters of either Matter Title, or Matter Code or Client Name.
- Billable or Non Billable?: Check, if it’s a billable time otherwise leave un selected or un-checked.
- Total Time: Total Time spent
- Billable Time: Out of total hours, how much time you feel is billable.
E.g.: Suppose total time taken is 4 hours, but you feel only 3 hours are the justified, remaining 1 hour will be booked under non-billable time. - Work Done: Brief description of the work done.
- Finally click on Save button (Floppy icon) to save the changes.
